
Each year, millions of pumpkins are sold every October, mostly to carve into Jack O Lanterns. After Halloween, 100s of tons of pumpkins go into the trash. This is a tragedy of epic proportions. Next year, instead of consigning your eerie work of art to the refuse pile, think about fresh pumpkin pie recipes.
There is a reason that Thanksgiving is associated with pumpkin pies. It was a way to make use of the leftover pumpkins from Halloween in colonial America. Remember, our ancestors who colonized this country had a tough time, with limited supplies to sustain them. They did their best not to waste anything, and to derive the most use from all of their supplies. Food was no exception. Even carved pumpkins were roasted and eaten. Pumpkin seeds were toasted and consumed as well.
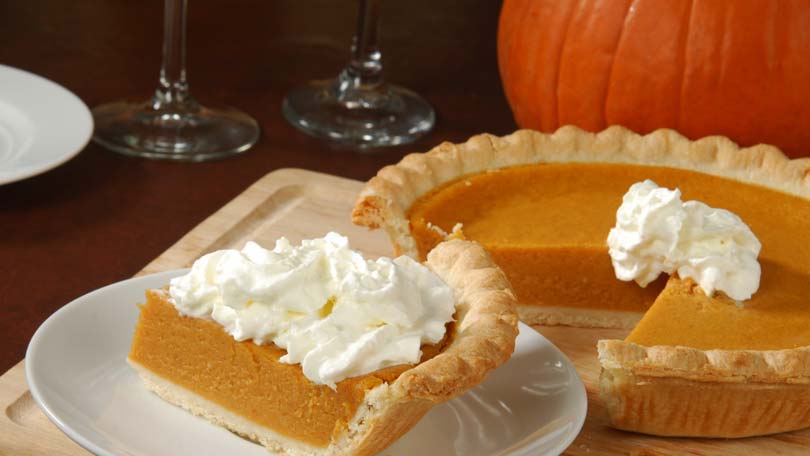
It may surprise a lot of people to know that there is more to making a pumpkin pie than just dumping a can of pumpkin, milk and spices into a pie crust, and baking it. If you have never experienced the wonderful treat of fresh pumpkin pie, you have really missed out on something special. There is no comparison between fresh and canned pumpkin. It’s like the difference between fresh baked bread, right out of the oven, and store bought, plastic wrapped bread full of lecithin, guar gum and completely dead. Fresh pumpkin pie is full of life, as opposed to canned pumpkins, which have had every last bit of life cooked out of them.
Making pumpkin pie from scratch is within even a modest cooks means. It just calls for a bit of knowledge, and some development of technique.
Pumpkins are a gourd-like squash, and belong to the genus Cucurbita, and the family of Curcurbitaceae. This includes all varieties of pumpkins, as well as the various squash species. In Australia, the word ‘pumpkin’ refers to winter squash. The origin of pumpkins is murky, but they are native to north America. Seeds have been found in Mexico dating back to between 5500-7000 BC. The ancient Greeks called them pepon, meaning “large melon”. Later, the French slurred the word into pompon. The English twisted this word into pumpion. The early American colonists, not to be outdone, further stretched the word into its modern form, pumpkin, or in the South, punkin.
Several varieties of pumpkin can be used for pies. The standard pumpkin sold at Halloween is the Lumina. These have been cultivated specifically for carving, with a thick skin, and very fibrous pulp. They can be used for pies with just a little extra preparation. Jack O Lanterns have already been scooped out. For unused pumpkins, split them and scoop out the stringy insides (but don’t throw the seeds away. Separate them. They can be toasted and eaten, or ground up and used in soups, stews and sauces for wonderful added flavor, and as a thickener). Discard the stringy stuff. Leave the skins on, and cut the pumpkins into 1”-1-1/2” chunks, place them in a pot and cover them to 1” in water. Simmer for 20 minutes, or until the pumpkin is tender. Drain, cool and peel off the skin. Now, you can use a food processor, or a potato-masher to mash the pumpkin into a semi-smooth pulp. Now it is ready to use in any fresh pumpkin pie recipe. If you are not going to use it immediately, you can freeze it for up to a year in a
Zip-Lok freezer bag.
Other varieties that make excellent pumpkin pies are:
• Cinderellas-these are beautiful French Heirloom pumpkins. This is the pumpkin that Cinderella’s coach was supposed to be made from. They have firm succulent flesh, with a good flavor.
• Pink Banana-this is a delectable pumpkin that makes a sensational pie. As the name suggests, they are lighter colored than standard pumpkins, and somewhat elongated. The pulp is finer grained and sweeter than other varieties. They are seldom seen whole in stores. They are usually chunked, and wrapped in plastic. Try to find whole fresh ones for an absolutely divine pie.
• Sugar Pie-this variety is as perfect as you could ask for in a cooking pumpkin. They are thin skinned, finer grained, and much sweeter than Luminas. They are also much drier, making for a more stable pie filling.
• Blue Hubbard-this is the pumpkin of choice for baking in New England. It has fine-textured, orange-yellow flesh that is medium dry, and medium sweet. It is perfect for baking, and soups.
Whatever type of pumpkin you decide to use, you need to select ones that are fully mature, with a good hard skin. The way to check them is to poke the skin with your fingernail. If it does not crack, the pumpkin is mature enough. You can also thump them, much like a water melon, and listen for the right “thud”. Another way is to heft them. A pumpkin with some weight to it for it’s size will have good dense pulp. Never carry a pumpkin by its stem. It can break off and leave an otherwise good pumpkin with an open wound, inviting infection and rot. Always check your pumpkins for dark and soft spots. Also look for nicks in the skin. The smallest nick can invite rot in. Be sure to check the bottoms, where they have been resting on the cool damp ground. If you are not going to use them immediately, be sure to store them where hungry animals, and insects will not snack on them.
Now you are ready to try the best fresh pumpkin pie recipe you’ve ever tasted:
Fresh Pumpkin Pie Recipe
This makes two 9-inch pies, so you will need 2 of your favorite pie crusts.
2 cups mashed cooked pumpkin
1 can of evaporated milk
2 eggs, beaten
1 cup brown sugar
¼ cup honey
1 tsp fresh ground cinnamon
1 tsp fresh ground nutmeg
1 tsp fresh ground ginger
½ tsp salt
2 uncooked pie crusts
– Preheat oven to 400ºF
– Make your crusts, and line two 9-inch pie pans with them.
– In a mixer (or if doing it by hand, a large mixing bowl), on medium speed, beat pumpkin, milk, eggs, brown sugar, cinnamon, nutmeg, ginger and salt until smooth. Dividing evenly between the two crusts, pour the mixture into the crust-lined pie pans.
– Bake for 40 minutes, or until a toothpick inserted in the centers comes out clean.
– Allow to cool for 20 minutes before slicing
– Garnish with Cool Whip, or whipping cream, and lots of hot, rich coffee.
Bakers Trick #1: If you have trouble with the edges of the pie crust getting too dark before the whole pie is done, cut foil into thin strips and lay these over the crust edge for the first 20-25 minutes of baking. Then remove them, and continue baking until the pies are done.
Bakers Trick #2: If you have trouble transferring the crust to a pie pan without tearing it, do it the way the pros do. Dust the crust lightly with flour, flip it over and dust the other side. Now fold one half over the other, then fold it again the other way, until you have a quarter wedge. Put a very thin layer of oil, butter, margarine, shortening, or non-stick baking spray on the pie pans. Now gently pick the folded crust up, lay it in one corner of the pie pan, and gently unfold it. Adjust it until it is centered, and you now have a perfect crust-lined pie pan. Repeat for the other pan.
Bonus Recipe
The Perfect Pie Crust – (Pâtè Briseè)
There are a few tricks of the trade to make a World-Class pie crust. Like most outstanding cooking, it’s more than just a list of ingredients.
Bakers Trick #3: For an extra-flaky pie crust, use butter, and shortening. The butter makes a deliciously flavored crust, and the shortening makes a very flaky crust. Mixing them gives you the best of both worlds.
Bakers trick #4: You don’t want to blend the ingredients. You just want to coat the fat (butter and shortening) with flour. Do not over work the dough. The less you can manipulate it, the better.
Bakers Trick #5: The colder the better. Everything should be chilled before you start. Place the flour, shortening, and butter in the freezer for 20 minutes before using. Place cold water in a large mixing cup with ice in it, and let it set in the refrigerator for 20 minutes before using it. This is how you make a killer crust…
2-1/2 cups all purpose flour
¼ cup shortening
2 sticks butter
1 cup ice-cold water
1 tsp salt
1 tsp sugar (optional)
All ingredients should be well chilled before you start. Putting the crust together must be done quickly, before the ingredients warm up, so have everything ready and easily at hand before you start. Have a pastry cutter close by and ready to go.
Cut the butter and shortening into the flour, salt and sugar, with the pastry cutter, or two butter knives (don’t use your hands. Their heat will warm the ingredients), as quickly as possible. You want it to be pebbly-looking, with pea-sized grains, or smaller. With a mixing spoon, and a tablespoon, stir in the cold water a tablespoon at a time, until the dough just starts to stick together. Check it by squeezing some together in your hand. If it sticks, then it’s ready. If not, keep going until it does.
Form the dough into a ball, then divide the dough into two equal halves, and wrap each in Saran Wrap (or equivalent). Refrigerate them for one hour. (Even this little amount of handling can activate the gluten in the dough. Great for bread, bad for crust. It needs to settle down and rest a bit before continuing.)
Roll each ball of dough out (one at a time) to approximately 1/8” thick. Place your pie pan upside-down over the dough, and cut a circle 1-1/2” larger than the outside edge of the pan. Turn the pan over, lightly oil, grease, or spray the pan with non-stick baking spray, and transfer the crust to the pan. Do the same for the other pan and ball of dough. Set both pans in the refrigerator for 15-30 minutes to let the dough settle-down once more. Now, fill the shells and bake.


